Classification of metrological instruments
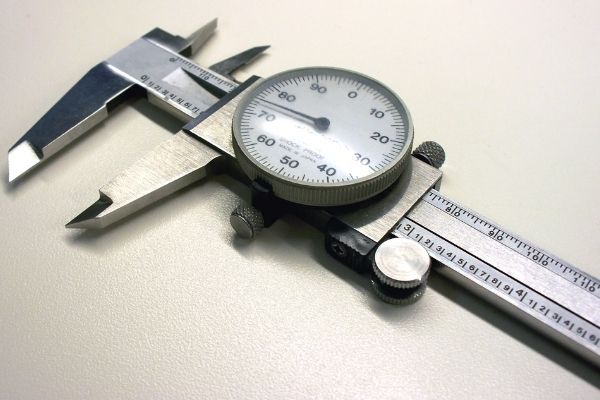
The following features allow you to classify professional tools for taking measurements:
- The method of obtaining testimony. Monitoring of measurement results can be manual or digital. In the second case, the data is processed electronically.
- The method of measurement. Mechanical measuring instruments produce results after direct contact with the surface of the part, and laser instruments are able to work remotely.
- The level of accuracy. Each tool has an error. Its dimensions are specified by the manufacturer.
There are other methods of classifying measuring instruments. One of them is for the purpose of the device. They can be intended for construction, plumbing, industrial tasks or be universal (for example, a ruler).
Features of measuring instruments verification
The technical characteristics of measuring instruments must exactly correspond to GOST, since the level of products and the possibility of its use by the consumer depends on the measurement results. Some manufacturers set their own specifications for their measuring instruments, but such devices do not inspire confidence among buyers.
The first test of the accuracy of the instrument is carried out in the manufacturer's laboratory. The products are tested by specialists and go on sale only after confirmation of their compliance with the standards. Rosstandart divisions are engaged in verification control. They issue licenses for the manufacture of measuring equipment based on the state measurement system and monitor the development of advanced techniques. The consumer receives a trusted instrument with high measurement accuracy.
In the future, the company using the measuring instrument must maintain the equipment in working condition. To do this, it is necessary to regularly transfer the devices to the laboratory for examination.
Types of measuring instruments
The measuring tool can be used to calculate the height and other dimensional characteristics of the part, the depth and diameter of wells, to determine the accuracy of equipment and other tasks. Let's consider some types of devices and their purpose.
Micrometers
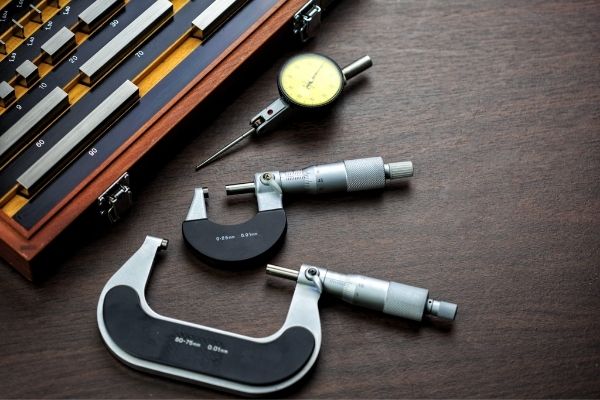 Designed to measure the linear dimensions of products. They give results for the controlled part with an accuracy of 0.01 mm. Depending on the model, these measuring instruments can be used for:
- calculation of the parameters of the outer surfaces of the product (smooth micrometer);
- work with flat blanks (sheet);
- edge and blade measurements (prismatic tool);
- connection control (threaded);
- precision parts research (lever);
- studying the diameter of pipes and other hollow cylindrical objects (pipe).
Nutromeres
They are used to measure the characteristics of grooves and openings in workpieces with high accuracy. The measuring device can be indicator or micrometer. Indicator ones help to obtain relative values of measurements of internal surfaces, and micrometric ones — absolute ones.
Calipers
These tools belong to the markup. They are designed to determine the linear dimensions of an object and compare them with standards. To use the device, it is enough to spread its legs apart and bring it into contact with the surface of the part. The result is recorded using a ruler. The caliper can be measured:
- the ratio of the length of the object to its height and width;
- the length of the bridge, interval, or step;
- the dimensions of the projections on the walls.
End measures of length
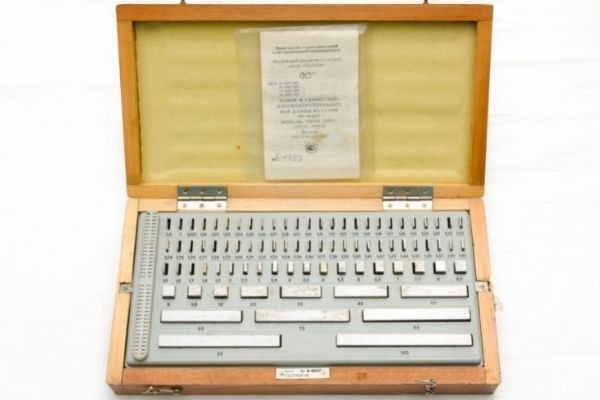 They are used to check the accuracy of other measuring instruments, and also help to mark up and adjust machines. These tools are available in the form of tiles with reference characteristics. They are sold in sets in cases or in individual copies.
In metrology, the calibers are closest to the end measures. But these devices do not work with flat surfaces, but with holes and shafts.
Calipers
They are used to determine the external dimensions of objects and the width of holes. There are electronic and manual. If the measuring device is supplemented with a depth gauge, it can also be used to determine the depth of the channel.
The way to use this tool:
- Hold the object with sponges.
- Fix the frame.
- Extract the part.
- View the result.
Shtangenglubinomers
The devices are designed to measure the depth of grooves and channels. They are available in electronic or manual execution. They are indispensable when performing the following operations:
- milling operations and boring holes;
- repair of aggregates;
- installation and construction works.
Rod gauges
It is impossible to manufacture gears without rod-tooth meters. This measuring device is complemented by two rods converging at right angles. The horizontal scale determines the thickness of the gear teeth, and the vertical scale determines their height. That is, the device has the functionality of a caliper and a depth gauge.
Rulers for verifications
The calibration rulers are designed to detect deviations of the surfaces of objects from planar and rectilinear indicators. These devices are made of steel and cast iron.
Classification by model:
- triangular with a cross section in the form of an equilateral triangle (LT);
- in the shape of a knife with bevels on both sides (LD);
- with four faces and handles (LH);
- I-beams made of carbon steel (SHD);
- high-strength rectangular (SHP);
- in the form of a bridge (CMM);
- triangular corners (UT).
Prisms for checks
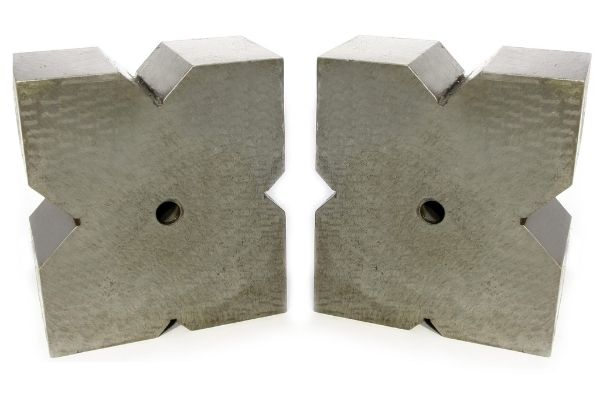 They are used to check the parallelism of surfaces or their verticality. With the help of prisms, the position of the shafts and axes in the equipment is adjusted, as well as the parts are fixed in the correct position before machining on machines (for example, before boring).
Designed to control the angle between two nodes or surfaces. These tools are constantly used in construction. The locksmith version of the device has a vernier scale that demonstrates accurate measurement results.
Templates for studying threads and radius of curvature
They are made in the form of a bundle of plates connected to each other. Radius models are designed to determine the radius of curvature of surfaces. Concave plates are used to calculate the external dimensions of objects. Convex devices help to make measurements of internal indicators.
Threaded templates allow you to determine the thread pitch and the number of turns in the inch or metric system of calculation. Both types of tools are used by applying the plate to the workpiece.
Probes
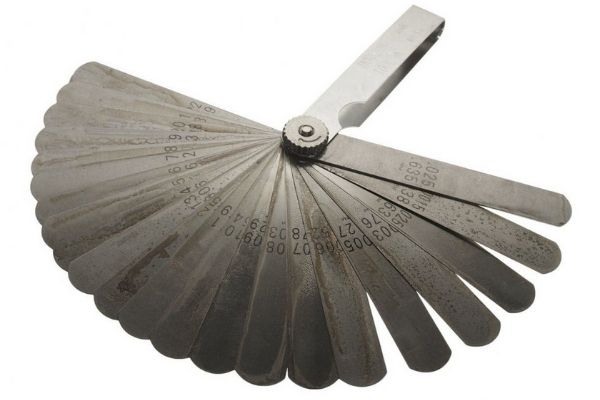 They are made in the form of thin plates and are sold in sets. The thickness of the tools in the set varies from 0.02 to 1 mm. The equipment is designed to determine the accuracy of fitting two parts to each other and measuring the width of the gap.
To obtain the size of the gap, it is necessary to introduce the thinnest probe between the objects. Then do the same with a thicker appliance. The procedure is repeated until the next plate cannot be inserted. The thickness of the last entered probe will be the width of the gap.
Roughness samples
Designed to monitor the quality of manufactured metal parts, including in hard-to-reach areas. The devices are also available in the form of tiles, as well as end measures of length. But, unlike the end measures, they have a rough surface.
These tiles are involved in a number of many manufacturing operations. They control the quality of milling, boring, grinding and other methods of processing workpieces. Using these tools, you can:
- check the smoothness of the sides of the object;
- make sure of the high quality of the outer planes of the workpiece located in a hard-to-reach area;
- quickly check the correctness of the production process at any of its stages.
Electronic equipment is not required to compare an item with a roughness reference sample. You can see the difference by touch and visually.
Any of the measuring instruments will produce accurate results only if the manufacturer's instructions are followed and properly stored. This applies to both electronic and manual devices. To keep the equipment in working condition, it must be used carefully, cleaned of dirt, protected from shocks, dust and water, stored in a case and lubricated, if necessary. It is also necessary to carry out regular verification in order to detect deviations in the measurement results in time.

Очень объемно и информативно, спасибо за навигацию! Сохранил себе в закладки)