Purpose of the device
A depth gauge is a measuring tool used in mechanical engineering and in those areas where parts of complex configuration are designed and manufactured. Otherwise called a nutromere. It is advisable to use the device only when working with metal elements. It is used by turners, millers, auto mechanics and locksmiths.
Accurate depth gauges are used not only to measure grooves and various recesses, but also to determine the size of protrusions on workpieces. A high-quality tool shows the most accurate values, the error is excluded or it is so minimal that it does not affect the assembly of the structure in any way.
Types of depth gauges
Devices for determining the dimensions of depths, depending on the counting part of the tool, are divided into rod depth gauges, micrometric and indicator models. The first ones are the most reliable and easy to maintain. Micrometers are characterized by a minimum error, but they are demanding to comply with the rules of operation and storage. Ingress of dirt, dust, lack of regular cleaning negatively affect the accuracy of the device. Indicator tools occupy an average position in terms of ease of use, they are quite reliable, give accurate parameters and are convenient during operation.
Each type of device can be supplemented with an electronic unit, due to this design, readings can be read not on a scale, but seen immediately on the screen.
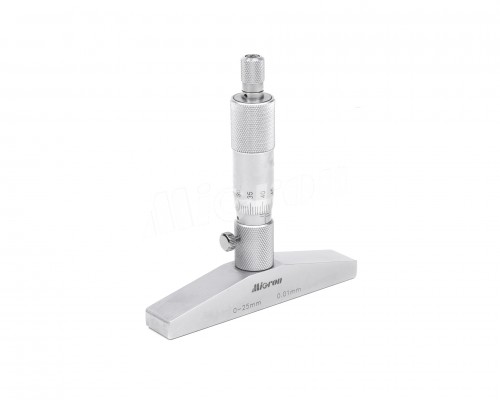
Features of the micrometer device
 How to use the depth gauge is precisely known by workers engaged in boring parts. But it is quite possible to work with this device at home, but you definitely need to know the differences between thickness gauges and the specifics of applying each type in practice.
The micrometric device is the most complex in design, it consists of:
- grounds;
- measuring probe;
- stems with scale;
- pads with which the extension of the rod is regulated;
- ratchet mechanism;
- screws for fixing the rod.
The device is characterized by high accuracy, manufactured according to GOST 7470-92 standards. You can use it to measure the parameters of deep holes and protrusions on parts. The measurement limit is 30 cm. The dimensions are taken on two scales. The first longitudinal one shows millimeters, and the circular one shows hundredths of them. The device must be thoroughly cleaned after each measurement and stored in a special factory case.
Before operation, the micrometer must be inspected for external damage. To make sure that the device is working properly, you need:
- install it on a flat metal plate with the base;
- push the measuring probe all the way out with the help of a drum, focusing on the sound of a ratchet;
- fix the readings. They must be zero, this indicates the health of the nutrometer.
If malfunctions are detected, the device is sent for calibration.
Features of the bar gauge
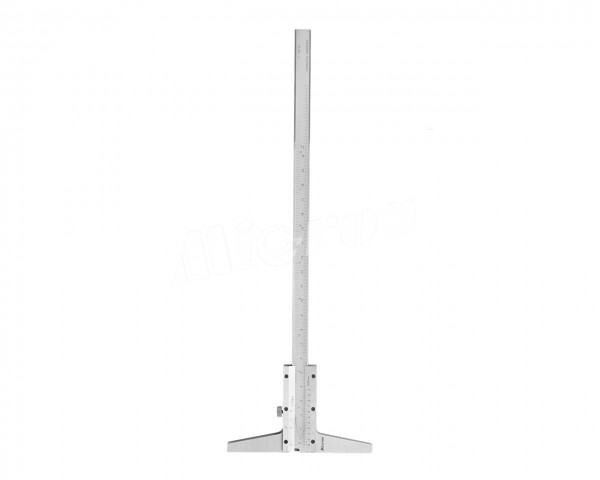
 It is similar in design to a caliper, but there are no movable sponges on its rod, since they are not needed when measuring depth. In addition to the mechanical shtangenglubinomer, electronic and digital versions are available. With the help of the tool, the dimensions of the grooves, grooves, ledges are determined.
There are three main details in the design of the device. This is a rod at the base, on which there is a hanging frame with a lock. A scale with a step of 1 mm is applied on the rod. On the vernier of the frame, the dimensions are indicated in tenths of a millimeter.
The shtangenglubinometer is very easy to use. The frame above the measured element must rest against the surface of the part. After that, a probe is pushed all the way to the bottom, in this position it is fixed with a bolt and readings are read from the scale.
Shtangenglubinometers are indicated by the marking:
- SHG – mechanical devices with vernier counting;
- SHGK – also mechanical devices, but with a circular scale for fractions of millimeters;
- SHGTS – electronic shtangenglubinometers, with a digital reading device.
The type of depth gauge, the step of its discreteness, the range can be found from the marking. So the designation SHG-250-0.01 indicates that in front of you is a mechanical depth gauge with a depth sizing limit of 25 cm and a division of 0.01 mm.
Micrometric instruments are a kind of shtangenglubinometers. They are designed to determine the values of the smallest depths. SHGN series devices are used when it is necessary to assess the size of defects on main and process pipelines with an aggressive environment – scratches, cracks (oil pipelines, gas pipelines).
Features of indicator devices
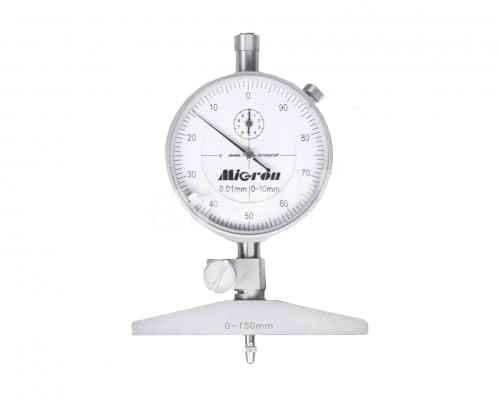
 Indicator type models (SHGK) are convenient to work with, since the values obtained during measurement are immediately displayed on an indicator resembling a dial. There are two scales in it. The main one shows the values in millimeters, the auxiliary one in centimeters. In the design of the device, the following are distinguished:
- base (shoulders). Designed to rest the tool on the surface of the part;
- the holder. The element into which the probe is inserted;
- locking screw. Clamps and securely holds the probe in one position;
- account device. Shows the depth dimensions;
- replaceable extension cords, for a set of sizes.
During measurements, the arrow on the dial moves due to the movements of the gear mechanism, which in turn is activated by the action of a retractable probe. With the help of the indicator model, it is possible to measure values up to 150 mm. The indicator device must comply with GOST 577-68.
Rules for using depth gauges
Accurate depth gauges are especially important in those industries where the operation of complex devices depends on the quality of workpieces. Measuring instruments should be periodically calibrated and verified, since the occurrence of errors exceeding the norm is not excluded during private use.
Depth gauges should be used without haste and after preliminary preparation:
- the grooves and holes to be measured are cleaned of small debris. The presence of even small foreign particles can distort the data, since the probe will not completely rest on the bottom;
- if the device uses replaceable probes, then first you need to choose the appropriate size;
- when working with a shtangenglubinometer or an indicator device, you only need to push the probe all the way out. Micrometric depth gauge requires clockwise rotation of the head, this leads to lowering the rod down. After the rod reaches the bottom, there will be resistance and the ratchet will work. After that, the head must be rotated 3 more times around the axis and immediately fix the extended rod with a stopper. After that, the indicator meter is removed and the readings are read.
The work must be carried out under certain temperature conditions. The metal remains stable at temperatures from +5 to +25 degrees. Lower or higher temperatures lead to its compression or expansion, if the readings are taken in the heat or in the cold, they will be inaccurate. Caution should also be exercised when handling the probe. Pressure on it and any other mechanical action leads to a curvature of the rod, and this negatively affects the accuracy of measurements.
Depth gauges are measuring instruments endowed with high sensitivity. It is necessary to handle carefully even the simplest of them – shtangenglubinometers. After each measurement, the nutromere is necessarily wiped with a clean rag, so that there are no fabric fibers left on the surface. If the work was connected with workpieces coated with grease and oils, then it is necessary to wash all parts of the structure in an alkaline aqueous solution, wipe dry, dry and put in a storage case.
Sometimes devices for measuring the depths of holes and ledges are in demand in production only during certain periods. In this case, the tools should be placed for long-term preservation. To do this, they are first rubbed with machine oil, then placed in waxed paper and put away in a case.
A tool for measuring depths should be purchased taking into account the specifics of production. For their own needs, a shtangenglubinometer is often enough, for high-precision workpieces it is more reliable to use micrometric models.
At the Enex online exhibition, you can purchase depth gauges of any kind and other Micron measuring instrument.

