Using special templates
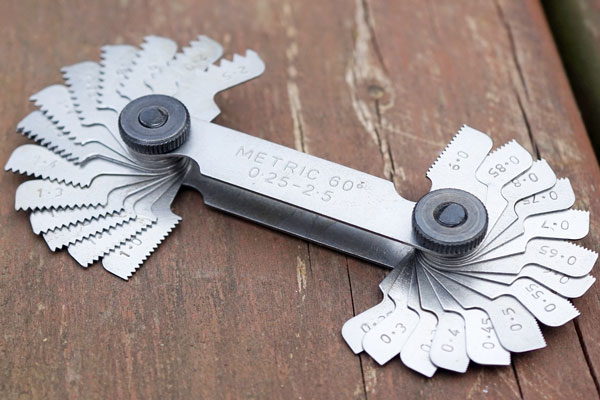
The easiest way to determine the thread pitch is using the set threaded patterns (usually it is called a threader). This set is a bundle of templates in the form of metal plates with a cut-out thread profile with different steps. Such plates can measure the turns on the bolts. This is done in four steps.
To measure the notch, follow these steps:
- Choose a template with visually suitable teeth in size.
- Attach it to the thread.
- If a complete match is not achieved, select the next plate and check it for compatibility.
- View the step value on the surface of a compatible template and find out the desired parameter.
 In this way, you can easily measure the distance between the turns on the outer surfaces of the bolts. Measuring templates are also suitable for determining the internal notch. In this case, you will need to provide high-quality illumination of the place that you will measure.
When working with templates, keep in mind that they come in different types. Metric are designed to determine the parameters of the notch on the metric fastener. These plates are marked with the letter "M" and are suitable for working with bolts, nuts, studs and other threaded parts. With their help, the notch is measured in factories, workshops and at home.
Inch templates can be used to measure fasteners with the appropriate cutting. Externally, these plates differ from metric sizes and the angle of the teeth. They are marked with the letter "D" and are most often used to determine the characteristics of plumbing equipment. Also, these measuring devices help to find out the parameters of parts for machine tools, aircraft and electronic devices.
The characteristics of the threaded notch are measured differently for metric and inch products. When identifying metric hardware, you need to find out the distance from one turn to another (between the highest points). When working with inch fasteners, the calculation is carried out differently. The number of turns on 1 inch of the surface is considered. The resulting result will be a threading step.
There are also universal templates containing two types of plates. They help to find out the characteristics of inch and metric bolts without an auxiliary tool.
Trapezoidal measuring patterns should be attributed to a separate group. These plates have teeth in the form of trapezoids. They are designed to work with the corresponding threaded notch.
When using templates, it is important not to forget that this is a full-fledged measuring tool. It requires proper handling and storage. Deformation of the plates or chips on their surfaces will lead to incorrect results during thread measurements. Therefore, keep the templates in a sealed package and protect them from mechanical influences.
How to define threaded parameters without templates?
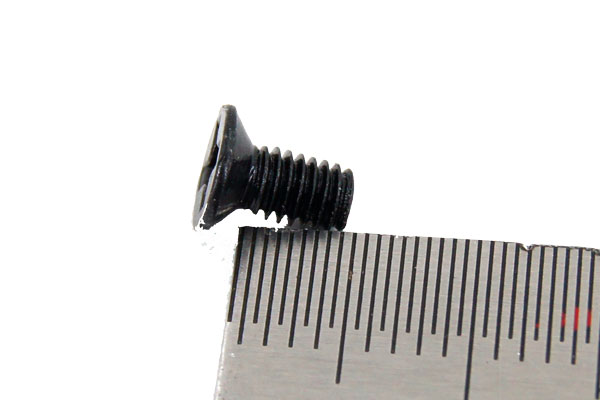
Special templates are most often present in the arsenal of professional craftsmen. But this does not mean that it is necessary to urgently buy professional devices for one-time tasks. You can also measure the slicing using rulers.
 The ruler allows you to determine the parameters of fasteners with less accuracy than special tools, but it can also be useful when identifying fasteners. Therefore, let's consider how to determine the thread pitch of a bolt without a thread meter in order to use this method in the absence of templates.
The order of measuring the number of turns for a metric notch:
- Place the bolt on a flat surface and attach a ruler to it.
- Compare the highest points of the thread with the ruler scale. If they exactly match the scale, then the distance between the turns is 1 mm. If there is no match, proceed further according to the instructions.
- Count the number of turns on a certain segment of the part. It is better to take as a basis a segment with a length of at least 20 mm. The larger the plot, the easier it is to find the exact dimensions.
- Divide the length of the segment by the counted number of turns to find out the distance between them. For example, there are 14 turns on a 20 mm long segment. That is, 20 : 14 = 1.42. The nearest standard distance to this indicator is 1.5 mm.
To determine the cutting parameters, you can not even divide the length of the segment by the number of turns. It will be enough to measure their number on a 2 cm section and see the characteristics of the bolt in a special table.
In the same way, you can find out the characteristics of the inch fastener. In this case, you need to start from the fact that 1 inch equals 25.4 mm. Follow these steps to determine the result:
- Put the bolt on the table and attach a ruler to it.
- Count the number of turns located on a 25.4 mm long segment. Usually they are 4-28 by 1 inch. If small fasteners are measured, their length may be less than 25.4 mm. In this case, it is necessary to reduce the segment by 2 times and carry out measurements on a section of 12.7 mm.
- The number of turns will be the step of the threaded notch of the part. If you determined the number of turns on a 12.7 mm segment, multiply the result by 2.
There is also a special table for inch hardware. You can substitute the resulting number of turns into it to find out the nominal size and outer diameter of the product (so as not to measure it yourself).
The dimensional characteristics of the bolts and nuts must match. Otherwise, the teeth of the threaded thread will not grip each other when twisting. Moreover, this applies only to large cuts, which cope with their tasks even with damage. A small notch is finally erased when the teeth do not match, after which it can no longer provide connections of parts.
How do I find out the threaded characteristics of the diameter of the fastener?
If you know the diameter of the bolt, you can do without additional measurements. Another table for metric products will help determine the parameters. It lists the list of existing diameters and the corresponding dimensions of the notch. Moreover, the values for small and large cuts in millimeters are given separately.
Measurements with a caliper
 If there is calipers
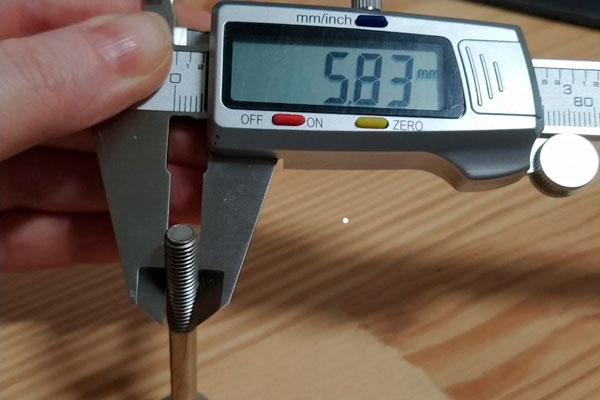
identification of fasteners also does not cause difficulties. In this case, you will know a more accurate result than when using a ruler. The caliper is necessary in order to measure the outer diameter of the fastener, which determines the parameters of the threaded notch. Consider how to find out the thread pitch of the bolt in this case. Proceed in this order:
- Measure the thickness of the fastener by the outer diameter. It passes through the highest points of the notch. Use a caliper for measuring. If it has a display, you will see the result on the screen. If it is not there, see the readings on the sliding part of the device.
- Compare the results with the data from the table.
- Find out the distance between the turns or the number of turns per inch.
From the standard table, you can get not only the dimensional characteristics of the cutting, but also its type: inch or metric.
When taking measurements, it should be taken into account that the notch may be conical. That is, the hardware will taper in the direction from the head to the tip of the rod. To find out, you need to make measurements on both sides of the rod: under the head itself and near the tip. In this case, the caliper should be positioned exactly on the outer projections of the notch.
If the diameter does not match (at the tip it is smaller than under the cap), then the cutting is conical. In this case, it is necessary to measure the hardware not at an arbitrary point of the rod. Count four turns from the cap to the bottom of the product and feel free to use a caliper. This will be the optimal point for measurements. For fasteners with a straight rod, an indent from the cap is not required. Straight hardware has the same diameter on any segment.
In some parts of the tool, there may be points where the levers loosely converge with each other. There is no need to place objects on these segments, because the results of measurements on them will still be incorrect.
If you don't have a caliper, but have micrometer, use this tool to determine the hardware parameters. With its help, you can also easily find the diameter of the product, so that you can then view information about the threaded notch in the corresponding table.

