Why do I need a caliper
First you need to determine what is being measured with a caliper gauge. The device is used to measure the heights of workpieces or parts. They measure the holes in depth, determine the position of the housing elements and other elements relative to each other. In addition, the shtangenreysmas is designed for applying precise markings to vertical surfaces, determining the center, and applying axial markings to products.
The tool is widely used in all areas of mechanical engineering, in the metalworking industry, used in turning and locksmithing. It can also be used for measurements in a small home workshop or garage.
The device provides a high degree of measurement accuracy. At the same time, it is quite easy to use. You can master the technique of working with a shtangenreismus according to the manufacturer's description without special initial skills.
How the caliper belt works
A classic caliper is a device that consists of the following basic elements:
- the base is a solid metal plate that provides a clear position of the meter on the surface;
- vertical rod with a scale in millimeters applied to it for measurements (ruler);
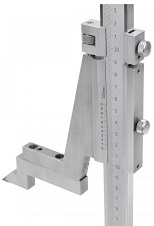
- the main working frame;
- vernier is a micrometric additional measuring scale located on the main frame of the meter;
- measuring foot, which is used to record the measurement results.
In addition, the shtangenreismus device includes fasteners, adjusting and auxiliary parts. These include mounting screws for fixing the frames, a nut with a screw for moving the main frame, a special micrometer feeding mechanism, a holder for installing replaceable tips of the measuring foot, and a scribbler for marking.
The vertical rod of the instrument with a millimeter scale applied is pressed into the massive base exactly vertically. The main frame moves freely on the vertical bar. The main frame has a vernier scale for micrometric measurements. It also has a side protrusion on which there is a holder with a screw for attaching a measuring or marking leg. Depending on the installed foot, the type of procedure being performed is determined – measurement or marking.
How to work with a caliper
The caliper is designed to measure, first of all, the heights of parts and elements. Therefore, when carrying out measurements, it should be placed on a flat, smooth base, which must be prepared beforehand.
The sequence of measurements by a caliper is as follows:
- the measuring instrument and the part to be measured are installed on a flat surface of the base;
- combine the caliper and the measured part with each other;
- the frame of the main scale of the device is moved down until it touches the surface of the measured part;
- precise positioning is performed using the microscopic pair mechanism – the working surface of the measuring foot is in full contact with the part;
- the position of the measuring frame is fixed with screws.
Next, the measurement result is evaluated. The number of full millimeters is determined by the main scale applied on the vertical bar. The number of fractions of an incomplete millimeter is determined by an auxiliary vernier scale. It is necessary to find a division on it that is combined with the division of the main scale. From this mark, the number of divisions is counted to zero vernier. This number is equal to a micrometer fraction of the height of the part being measured.
The algorithm for marking using a caliper is practically the same as measuring. The difference is that a marking leg (scribbler) is installed on the device holder instead of a measuring one. Next, move the frame along the rod and use the scales to set the required size. The position of the frames is securely fixed with screws. The marking leg has a hard, sharp tip, which is used to mark the surface of the part. To do this, it is positioned so that the carbide tip of the scribbler forcefully touches the surface of the part. Then, holding the tool by the base, it is shifted along the surface of the plate in a horizontal plane.
To achieve maximum accuracy of the result, the following recommendations must be followed when carrying out measurements::
- measurements should be carried out at temperatures ranging from +10 to +20 °C;
- do not allow direct sunlight on the instrument;
- drafts are not allowed in rooms where measurements are carried out with a caliper;
- the meter must be installed outside the direct range of heating or other heat-generating devices;
- The parts to be measured must have a normal temperature - excessive heating or cooling is not allowed.
In addition, when installing a pressure gauge in a new room, it must be given time to adapt before taking measurements. This time depends on the size of the workpieces being measured and the temperature conditions. It can range from 15 minutes to 8 hours.
What is the verification required for
The main thing that a caliper is needed for is height measurement and marking with a given degree of accuracy. These procedures must be performed in compliance with the requirements for the maximum allowable measurement error. Exceeding this value violates the accuracy of manufacturing or processing parts. This leads to marriage and the associated increased costs.
The measuring device is inevitably subject to wear during operation. In addition, the caliper may be damaged or deformed as a result of careless handling, violations of measurement technology, or due to improper use of the device. Such deformations and damages, as well as natural wear, lead to an increase in gaps and an excess of the permissible error. Therefore, before carrying out measurements, the calibration of the caliper must be performed.
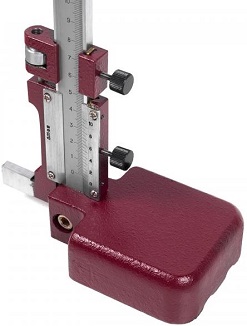
verification is a procedure for monitoring the degree of accuracy and the actual error of a meter. It is performed to allow the tool to work. Verification must be carried out strictly according to the methodology described in the regulatory document MI 2190-92.
|
It is necessary to perform verification before taking measurements. It allows you not only to detect possible meter malfunctions, but also to evaluate the correctness of the set settings and make the necessary adjustments.
The verification procedure is performed in the following order:
- the caliper is placed on a reference plate with a flat, smooth horizontal surface;
- the main frame is lowered down until the measuring foot touches the surface of the reference plate;
- the scales are checked on the main (millimeter) ruler and on the vernier.
According to the verification results, the suitability of the shtangenreysmas for measurements is assessed. Classic manual models are considered suitable if the zero marks on the main scale and on the vernier coincide. For models with circular scales, the indication of suitability will be that the arrows of both dials are exactly at zero points. The value "0.00" should be displayed on the display of the electronic caliper. If these conditions are not met, the meter is not allowed to operate. It is necessary to check its settings or serviceability.
The verification procedure must be performed at least three times to eliminate the possibility of error. Measurements with a caliper are carried out only upon successful completion of three checks.
Types of calipers
Micron produces different types of calipers, which are classified according to different criteria. Despite the same general purpose of all devices, their scope of application may differ according to their specific variety.
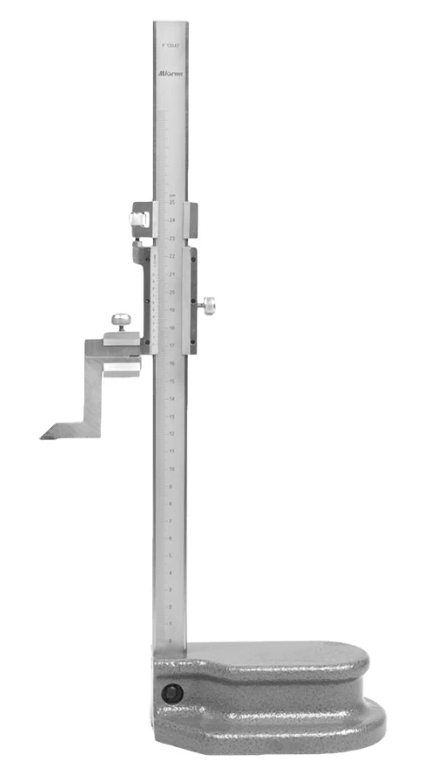
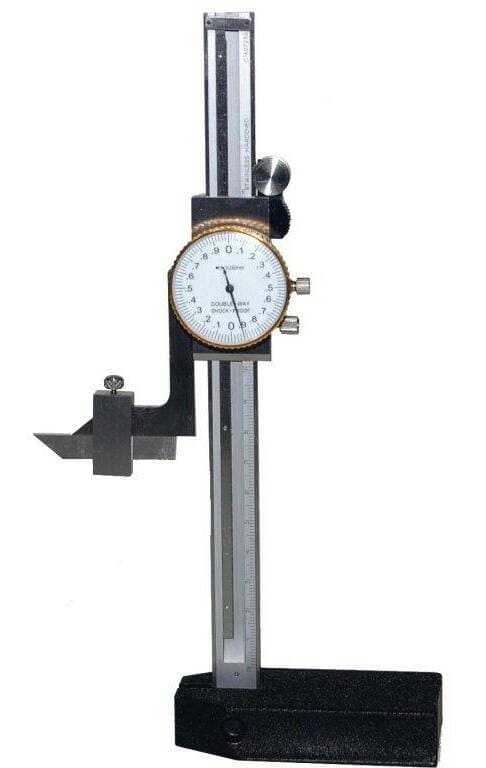
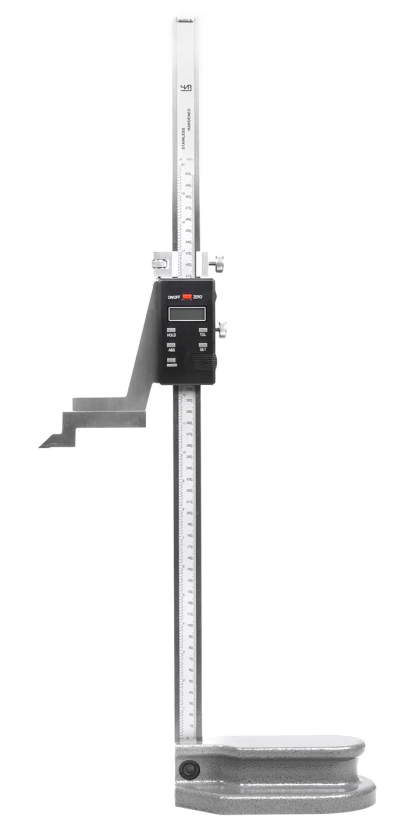
According to the design and principle of operation, there are three types:
- Manual (SR). The simplest type of meters. It works according to the principle of a conventional vernier caliper - readings are determined by the scales of a millimeter and micrometer ruler.
- With circular scales (SRK). The results are displayed on circular dials with arrows. This greatly simplifies the taking of readings.
- Digital (CC). The readings are displayed on a digital display. Operation control is provided by an electronic control unit. Devices of this type are the most accurate and functional.
|
|
|
In addition, the classification of calipers is carried out according to the measurement range. This is one of the main technical characteristics of the tool, which determines the minimum and maximum height of the parts and workpieces measured by a specific model.
The following standard measurement ranges are distinguished:
- from 0 to 250 mm;
- from 40 to 400 mm;
- from 60 to 630 mm;
- from 100 to 1000 mm;
- from 600 to 1600 mm;
- from 1500 to 2500 mm.
Another important parameter is the accuracy class, which determines the maximum value of the permissible error of the meter. The error values for different accuracy classes depend on the type of calipers by design. For manual models, the error of the first accuracy class is no more than 0.05 mm, and the error of the second class is 0.1 mm. For dial devices, these values are 0.02 mm and 0.05 mm, respectively. For electronic models, the margin of error is not more than 0.01 mm.

