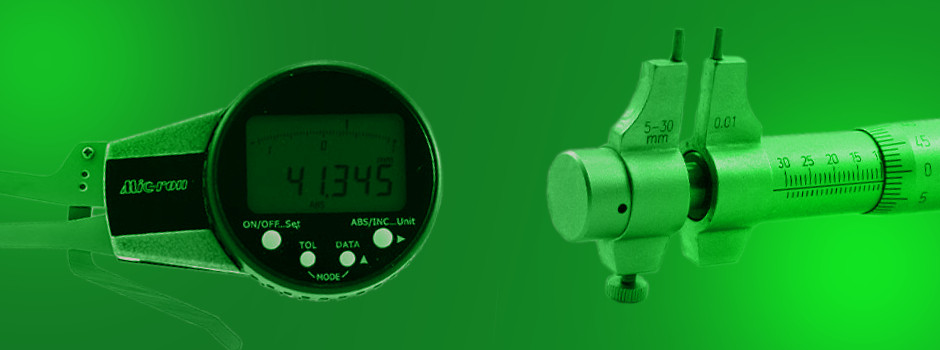
Purpose and device
A nutrometer is a tool designed to determine the internal distances between surfaces, unlike a micrometer, which determines only the external dimensions. With its help, the following parameters are determined:
- diameters of cross-section holes of any kind (round, square, oval, etc.);
- the width of the slots;
- distances in details of complex shape.
They are used when measurements made by another tool are not accurate enough or in places where it is simply impossible to reach with a caliper, ruler and tape measure.
Modern devices determine the dimensions with high accuracy - up to 0.01 mm. In this case, the error value is not more than 0.006 mm. Fractions of millimeters play a big role in technology.
These tools are widely used in mechanical engineering, instrument making, car service stations, locksmiths, for example, to check the cylinders of the internal combustion engine. Turners and millers who grind parts by hand also work with a nutrometer. It is needed not only in the manufacturing industry. It is used by jewelers who create jewelry, even shoe repairers.
This tool is indispensable in the following cases:
- in the manufacture of parts with internal cavities;
- to determine the degree of wear;
- verification of compliance with the actual dimensions and those declared by the manufacturer;
- measuring the accuracy of different devices during their certification.

Types of nutromeres
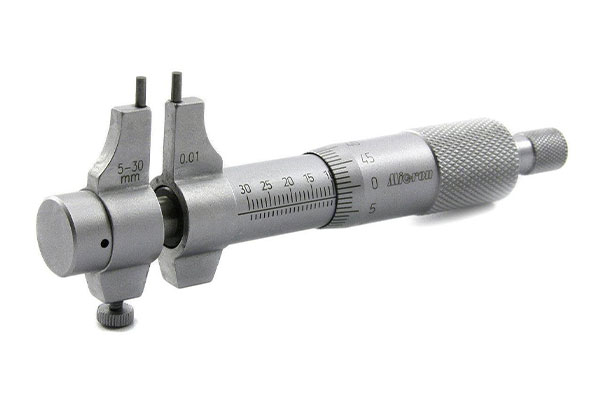 With their help, measurements are carried out by two methods: absolute and relative.
According to the method of measurement, the following types of nutrometers are distinguished:
- micrometric. To measure absolute values;
- indicator. It is not the size itself that is determined, but the deviation from the reference size along the entire length of the surface (relative method).
Each species has its own subspecies, differing in design features, type of contact with the surface and a number of other characteristics.
Tools are distinguished by the number of points of contact (the number of tangent elements):
- two-point. The most common models;
- three-point. These devices have three tips, spread out at an angle of 120 degrees. The measurement accuracy is higher.
Devices are also distinguished by the display of parameters. According to the micrometer scale, the values are determined independently. In indicator models, the value is indicated by an arrow on the indicator scale. Depending on the accuracy of the device, the number of arrow pointers may be several.
Device differences by specifics:
- for small holes. Designed to measure holes in small parts;
- lever. They are equipped with an arrow pointer or digital display and levers connected to the protruding ends. The ends are directed in opposite directions. Designed to measure grooves inside cylindrical parts.
In addition, there are varieties: with side sponges, collet, cone, wedge, ball telescopic and others.
There are other modifications of stichmas, for example, by the type of tips. Devices with a pneumatic tip (cork) are used in the automotive industry. Give accurate results.
Use of electronic nutrometers
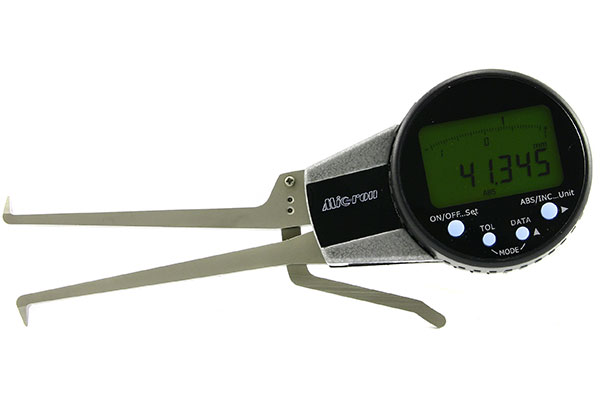
The most accurate of all is electronic. It is used to obtain absolute sizes of hole diameters in production, in laboratory conditions, etc. The high accuracy of the tool allows you to work without increasing the error even with the smallest holes. Instead of a measuring scale, it is equipped with an electronic display on which the measurement results are displayed. A nutrometer with an electronic indicator consists of a tip attached to a digital head. It is distinguished by the presence of additional functions for ease of operation: a zero setting button, switching units of measurement, and so on. Complex preparation and a special temperature regime are not required for work. The manufacturer specifies how to set up and carry out measurements with an electronic device in the operating instructions.
The device of micrometric nutrometers (NM)
Structurally, the micrometer nutrometer consists of the following main parts:
- a drum with a measuring scale and a micrometer screw connected by a cap;
- rod with spherical tip;
- stopper or fuse. Fixes the tool immobile;
- nutrometer extenders. They are made of steel. They are applied depending on the internal size of the measured part.
Micrometric models capable of recording a distance of more than 1.25 meters are watch-type nutrometers. A clock indicator (0.01 mm pitch) is built into the head. They have an indicator scale for removing parameters. They are available in three versions with a measuring range from 1.25 to 10 meters. They are denoted by - NMI (micrometer indicator nutrometer). The devices are stored in cases that protect against external negative influences, ensuring a long service life.
Device of indicator nutrometers (NI)
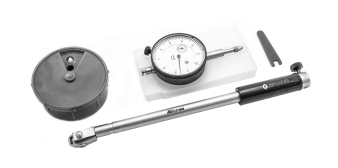 Stichmas for measuring dimensions by the relative method structurally consist of the following parts:
- digital head;
- replacement rod;
- tip (working part);
- handle.
The handle of the device is made of a material with low thermal conductivity. In this case, the thermal effect does not affect the measurement results. The rods are fixed to the tip depending on the distance between the walls of the part. They are supplied complete with the device, which expands its functionality. They are made of hardened steel grades, which eliminates their deformation. This should be taken into account if you need to make a rod yourself. The process itself is very simple: you need to take a workpiece made of hardened steel and cut a thread suitable for the tip.
There are two scales on the arrow pointer. On the main scale (with a division of 0.001 mm), the deviation from the template size is displayed, and on the second one, the number of full revolutions of the arrow on the main scale is indicated (the revolution corresponds to 1 mm). The error of the devices ranges from 0.025 to 0.15 mm.
To obtain high-precision values, NI-V. is used. It differs from the classic models in the design of the digital head. The accuracy is 1mkm. It is intended for high-precision measurements of small diameter holes.
The principle of operation of NI is based on the transmission of the value of the compression ratio of the rod to the indicator pointer.

How to set up a micrometer nutrometer
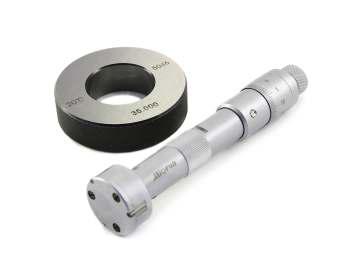
Before starting measurements, you need to make sure there are no external defects, pay attention to the scale of the micrometer nutrometer, tips and proceed directly to the setting. The setup consists, first of all, in its zeroing. In another way - calibration. It is necessarily carried out before each upcoming measurement.
How to set the nutrometer to zero
The procedure is recommended to be carried out at an ambient temperature of + 20 degrees and humidity not higher than 80%.
Calibration takes place in several stages:
- connect the head to the tip and apply the tool to the installation measure;
- rotate the drum until the surfaces of the head are pressed against the installation measures;
- tighten the locking screw and remove the device.
To check whether you managed to set the nutrometer to zero, you can compare whether the risk is combined with the zero value of the longitudinal scale with the zero mark on the drum. If the marks do not match, the stichmas need to be adjusted.
In some models, calibration is not required, since they are already initially set to the desired parameter.
How to use a micrometer nutrometer correctly
The measurement process includes the following steps:
- set the approximate diameter of the measured hole on the device. It is previously measured with a ruler or a caliper;
- place the spherical head inside the hole so that it is perpendicular to the longitudinal axis;
- rotating the drum, press the tool against both walls;
- tighten the locking screw and remove the rod with the tip;
- to the resulting value, add the length of the head and the extension cord (if used).
In principle, using a micrometer nutrometer is simple, convenient and fast. Even with a slight margin of error, you get an accurate result.
To determine the maximum and minimum values when measuring cylindrical holes, the device is swung in the longitudinal and transverse directions.
How to set up an indicator nutrometer
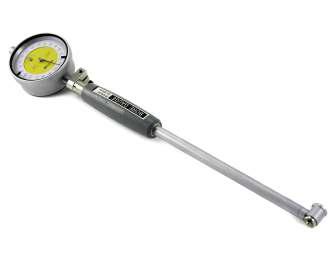
IM, unlike micrometric, does not determine the size or diameter, but the deviation from the reference dimensions. Before taking readings, it needs to be prepared for work, set the indicator nutrometer to the base size.
This will require a calibration ring. You can also use an end measure with a special clamp, a caliper, a micrometer. Zeroing is carried out at an air temperature of + 20 degrees and a humidity of no more than 80%.
The setup includes several steps:
- a replacement rod is selected and fixed to the measuring rod;
- the size corresponding to the rod is set on the micrometer or clamp;
- clamp the locking screw;
- the indicator nutromere is fixed in a vice through the stem sleeve;
- the rod is placed between the measuring jaws of a micrometer or clamp;
- rotating the indicator head, align the arrow with the mark "0"
How to use the indicator nutrometer correctly
Difficulties with its application are extremely rare. To carry out the measurement, you need to do the following:
- position the tool inside the hole. The rod must be positioned at an angle of 90 degrees to the longitudinal axis of the part;
- adjust the position of the instrument with light swings;
- determine the value by the arrow. It should point to zero. If there is a shift to the right of the zero value, this indicates a smaller diameter size compared to the reference one, and if the arrow is shifted to the left - a larger one;
- to take readings, I use two scales of the stichmas indicator (with millimeters and hundredths of a millimeter);
- to the resulting value, add the value of the diameter of the reference.
When measuring holes that are too deep, use the extension cords included in the kit.
Indicator-type devices are used to determine the level of wear of the engine cylinder block, connecting rods, and a number of other parts and allow us to conclude about the possibility of their further operation. The service life of the indicator nutrometer can be extended if it is used correctly.

Technical requirements
There are a number of requirements for tools:
- must be manufactured in accordance with GOST 868-82 or GOST 10-88;
- the difference in readings is 1/3 of the scale division;
- error limits are 0.004 - 0.09 and 0.005-0.022. The range depends on the accuracy class, the place of measurement;
- production of heads - from hard alloys (not lower than 57 HRC);
- manufacture of the handle - from materials with low thermal conductivity;
- the outer coating is durable, anti-corrosion (GOST 9.032, 9.033).
The shelf life of the device in the package is 2-3 years. Every 1.5-2 years are subject to re-conservation.
Care and maintenance
All measuring instruments, including shtrikhmas, require proper care, compliance with storage and operation conditions. To extend the service life (at least 4-5 years), you need to follow simple rules:
- store in the original packaging in a warm room;
- avoid sudden temperature changes;
- protect from falling. To a greater extent, this applies to arrow models;
- exclude contact of the tool with water or aggressive environment.
Micrometric models require special attention. Their verification must meet the requirements of GOST 17215071. Checked:
- marking, type, completeness;
- the size of the strokes of the rod, drum;
- tool tolerances, head errors, distance from the end of the drum to the stem;
- beating at the point of contact;
- interaction of device elements and a number of others.
Indicator models are carefully inspected, trial tests are carried out, metrological and technical characteristics are determined for compliance with the requirements of MI 2193-92, 2194-92.
The tool may break if it is not used properly. To avoid this, first read the manufacturer's instructions.
The Micron catalog presents various models of nutrometers suitable for all types of work.

